

Cupsleeve Planning Bootcamp (For Beginners)
Come my child, let me teach you how to be oshikatsu cringe and free.

Well well well.
You want to plan a cupsleeve? Well, good for you! Planning a cupsleeve isn’t terribly difficult, but it can be hard to start if you have no idea where to begin.
In this, we’re going to talk about the planning and production of a cupsleeve.
The only thing we are NOT going to be discussing is ‘crowdfunding’ a cupsleeve. This can be a very daunting task which requires opening some form of online shop form and opening preorders for a bigger amount of goods. However, we will be talking about manufacturing goods, and you can use that knowledge to pursue this option in the future if you wish!
A line by line calendar will be provided at the end of this article to show the order of ALL my steps including timed posts, reminders, etc.. This will be an EXTREMELY detailed timeline.
This will be put into parts, each in order of pre-production, production, actual event, and post production. So lets dive in.
PRE-PRODUCTION
So, the best thing you can do during this phase is planning, planning, planning.
In this phase, it is expected for you to start this at LEAST 3 to 4 months before the event. This will give you plenty of time to tackle all phases and have extra time for any delays.
First things first. What is your cupsleeve? Where do you want to have it? How many people do you think will attend? These are all data and logistics you’ll need to figure out.
Social Media and E-Mails
First things first, figure out how you want to use social media. For the most part, people will make dedicated pages for cupsleeves (most are platformed on Instagram. It is highly recommended to start there as well).
As for e-mail, making a cupsleeve dedicated e-mail is also recommended. This is how you’ll communicate with a venue, artists, vendors, cosplayers, and more. Instagram DMs are fine for certain things, but for venues, artists, and other product production, you will NEED to do this over email.
Once those are made, you can move onto canvassing.
Interest Forms
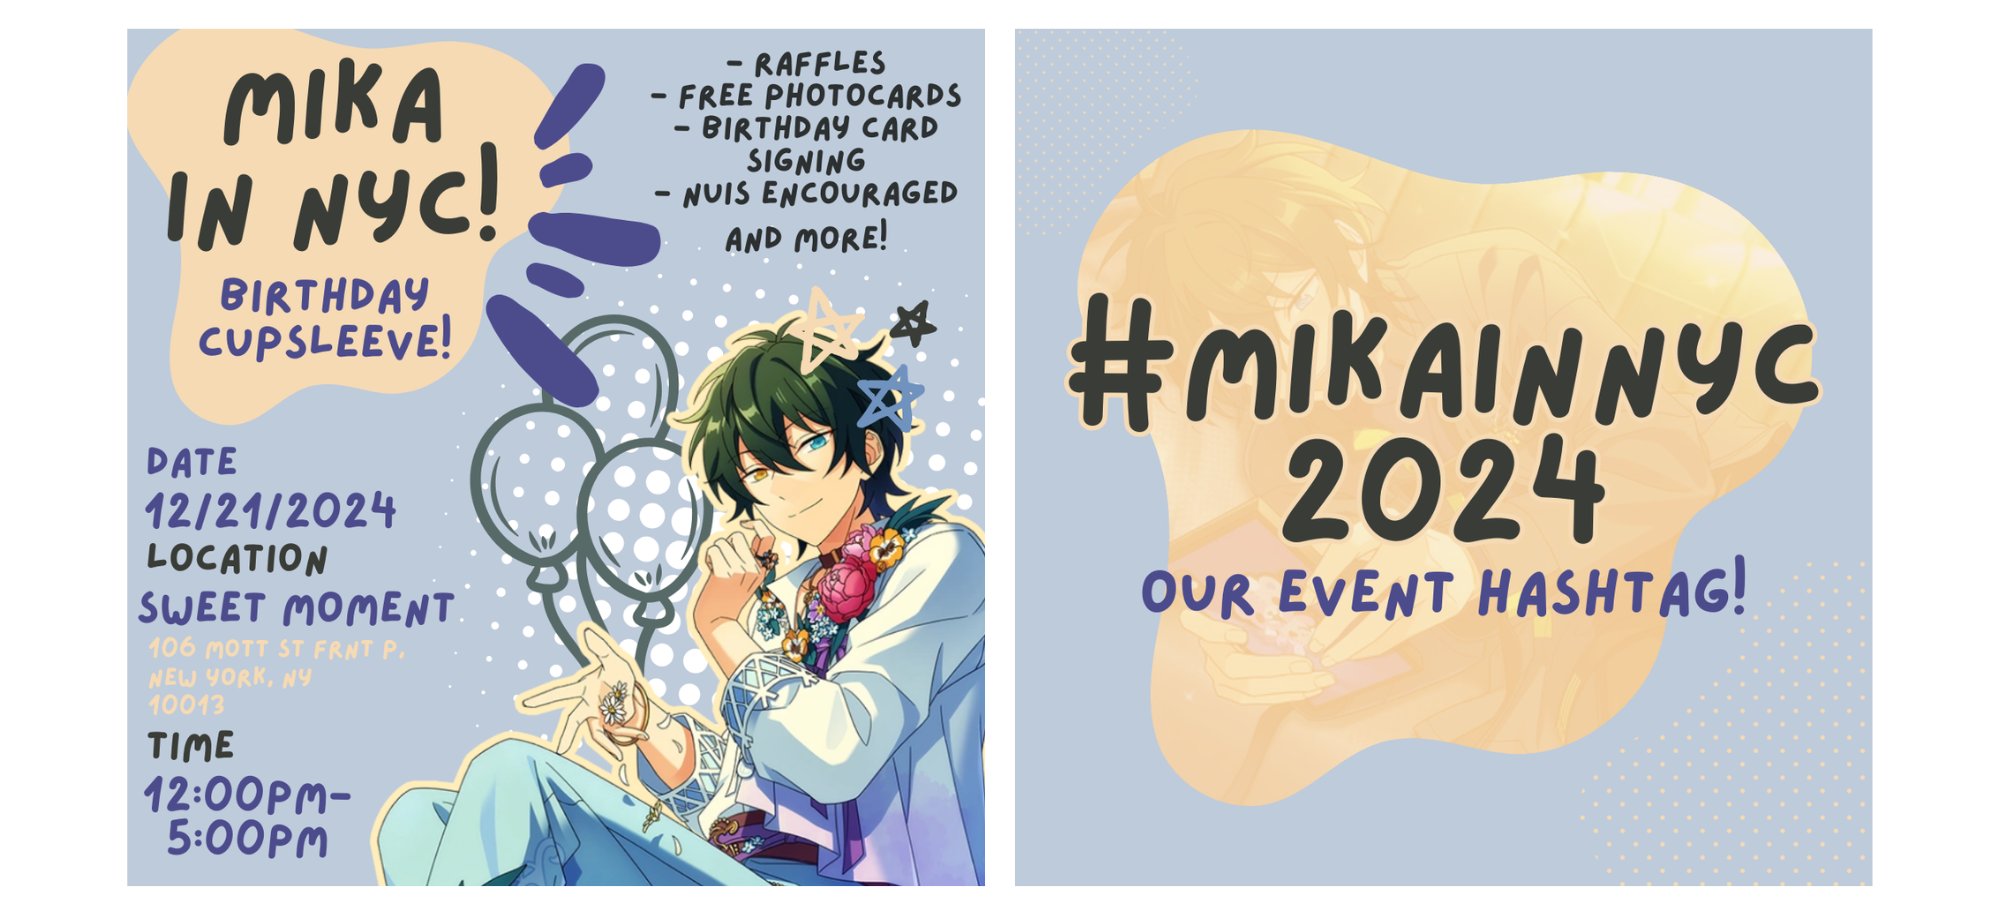
Google Forms are the best free way to do this. Simply gauge interest. You don’t need a venue quite yet at this stage, but you DO need to know a general area and time of year. For example, if you live in New York [City Area], you will mention that this is a cupsleeve happening in New York, during the month of, lets say, June. I’ve placed how that example SHOULD look below. Keep it simple and to the point. You just need a headcount on who is interested.
Personally, I love using Partiful. There are a lot of benefits to using the application, and you can use it beyond the interest check. You can send text blasts ANY time before, during, or after the event. You can have a public album for people to upload to after, and have people comment. You can also use it to remind people of scheduled events incase the venue gets too loud and rowdy. Overall, while the app is intended to be used for parties, it’s an AMAZING tool for cupsleeve planning.
Venue
Now, let's find a venue. After a week or two, you will now have a rough headcount to base your venue size.
If you’ve gone to cupsleeves before, you can use one of those venues, as they have experience hosting cupsleeves. This makes contacting a venue MUCH easier. Simply use their preferred contact, whether it be e-mail or phone, and ask how their cupsleeve planning process is.
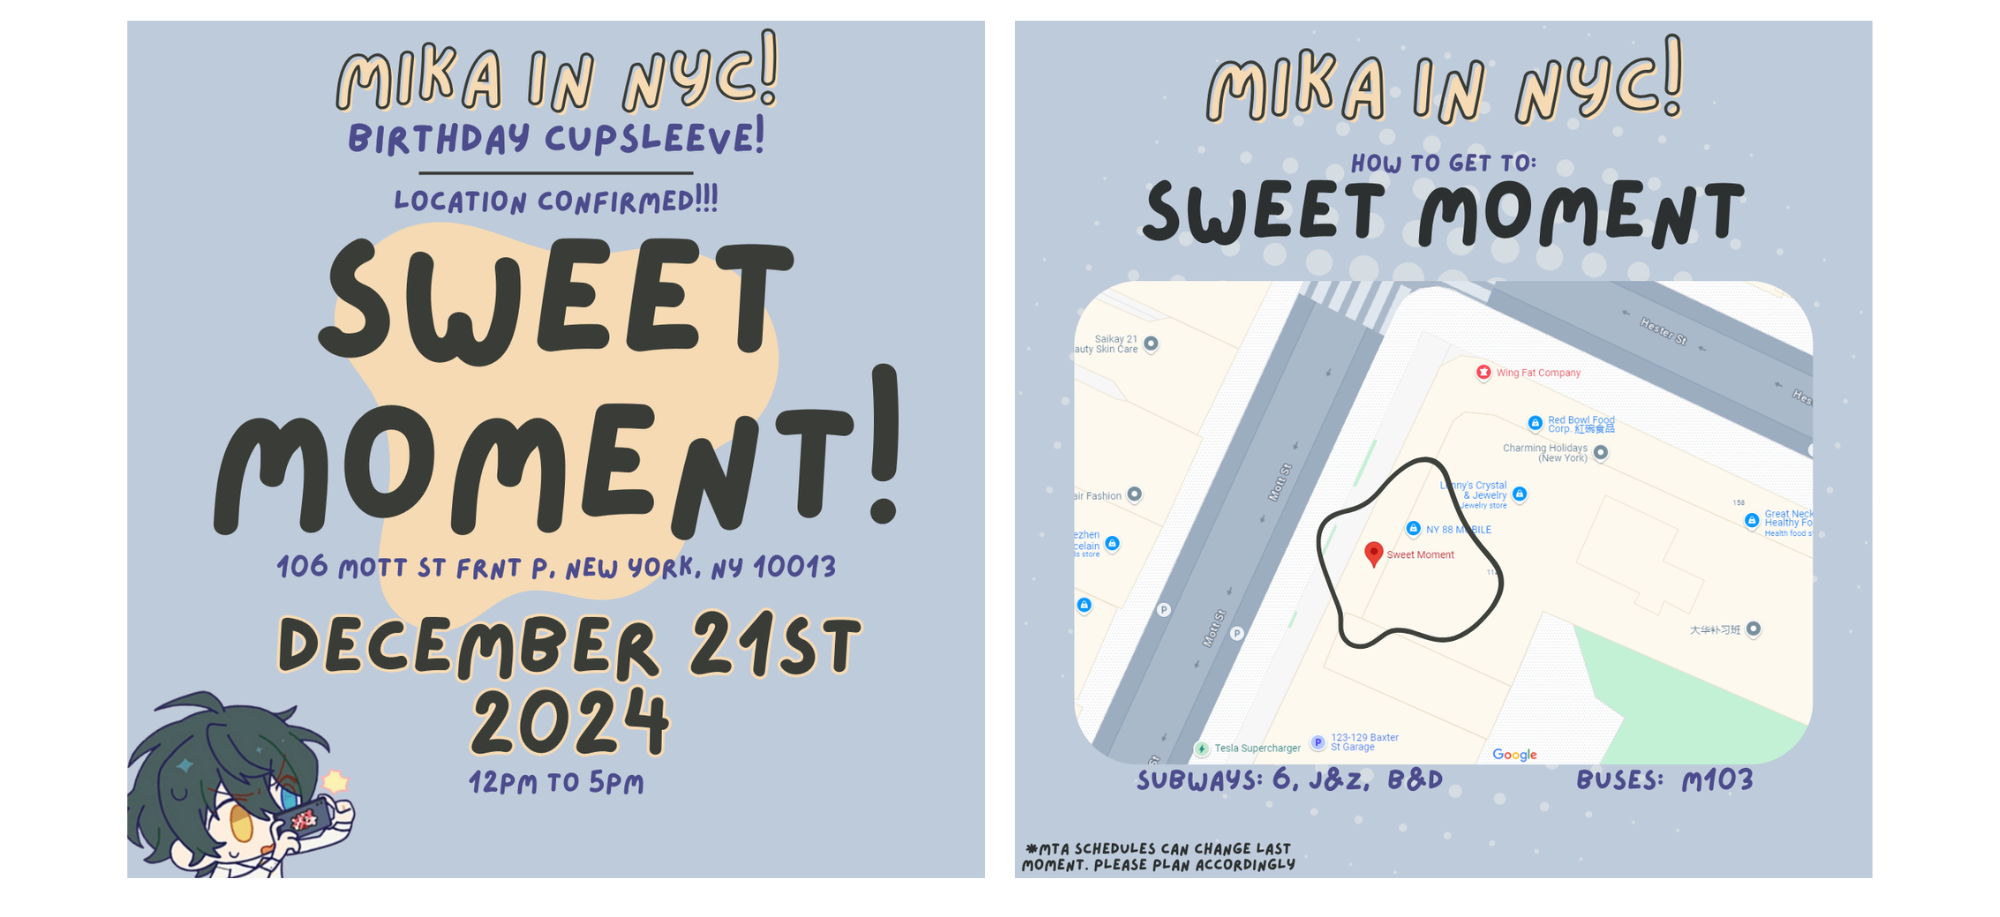
For example, I used Sweet Moment NYC for my Mika Cupsleeve because the venue was large and they have held dozens of cupsleeves, to the point where they already had a form ready for me to fill out via e-mail. They were also my back up venue because my first venue that i booked, cancelled on me! ALWAYS HAVE A BACKUP LOCATION, YA’LL! Which was 100% a blessing in disguise because the turn out was so big, that this was the best upgrade I could ask for! (Love ya’ll Sweet Moments.)
However, if not, then you’ll have to do some cold calling and emailing. This is a little more effort but still, if you’re determined to have a cupsleeve you can’t give up! Contact your local cafes. Pitch the cup sleeve to them. If you need to make a hand out or power point explaining a cupsleeve, then do it!
A cupsleeve is a public event that the café benefits from, as attendees HAVE to spend money to be able to get their goods.
Venues shouldn’t be charging you because of this. The cupsleeve should be a symbiotic relationship, and an agreement that you will be sharing the public space with regular customers while the cupsleeve is going on.
This isn’t to say you can’t rent the venue space, for example, many cupsleeves are ambitious projects, and the turn out will be big. Due to this, hosts may charge entry because they needed to pay for the venue OR needed to pay to use more of the venue’s space (for example, an event space/hall). However, I don’t recommend this if its your first time.
This is why explaining what a cupsleeve is, to venues that have never done it before. So be patient and know your worth!
Once you have a venue, you can announce it on your social media that the cupsleeve is officially happening!
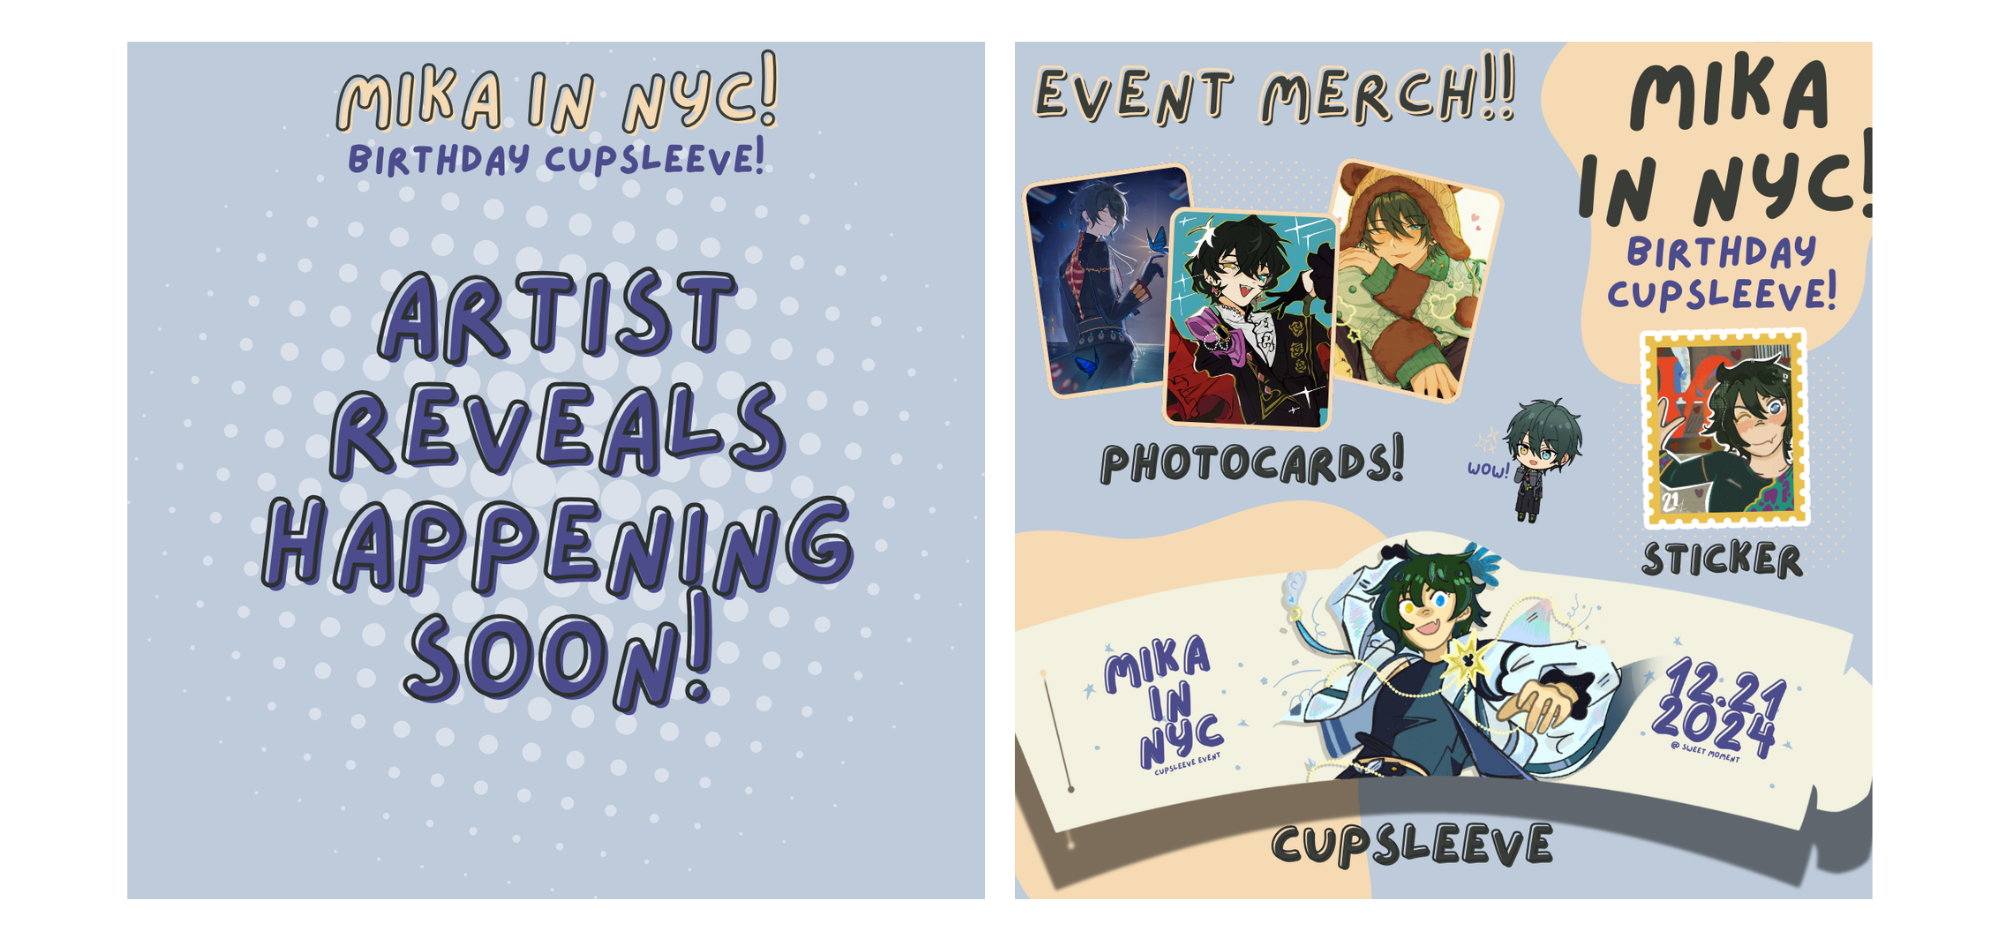
THE MERCH
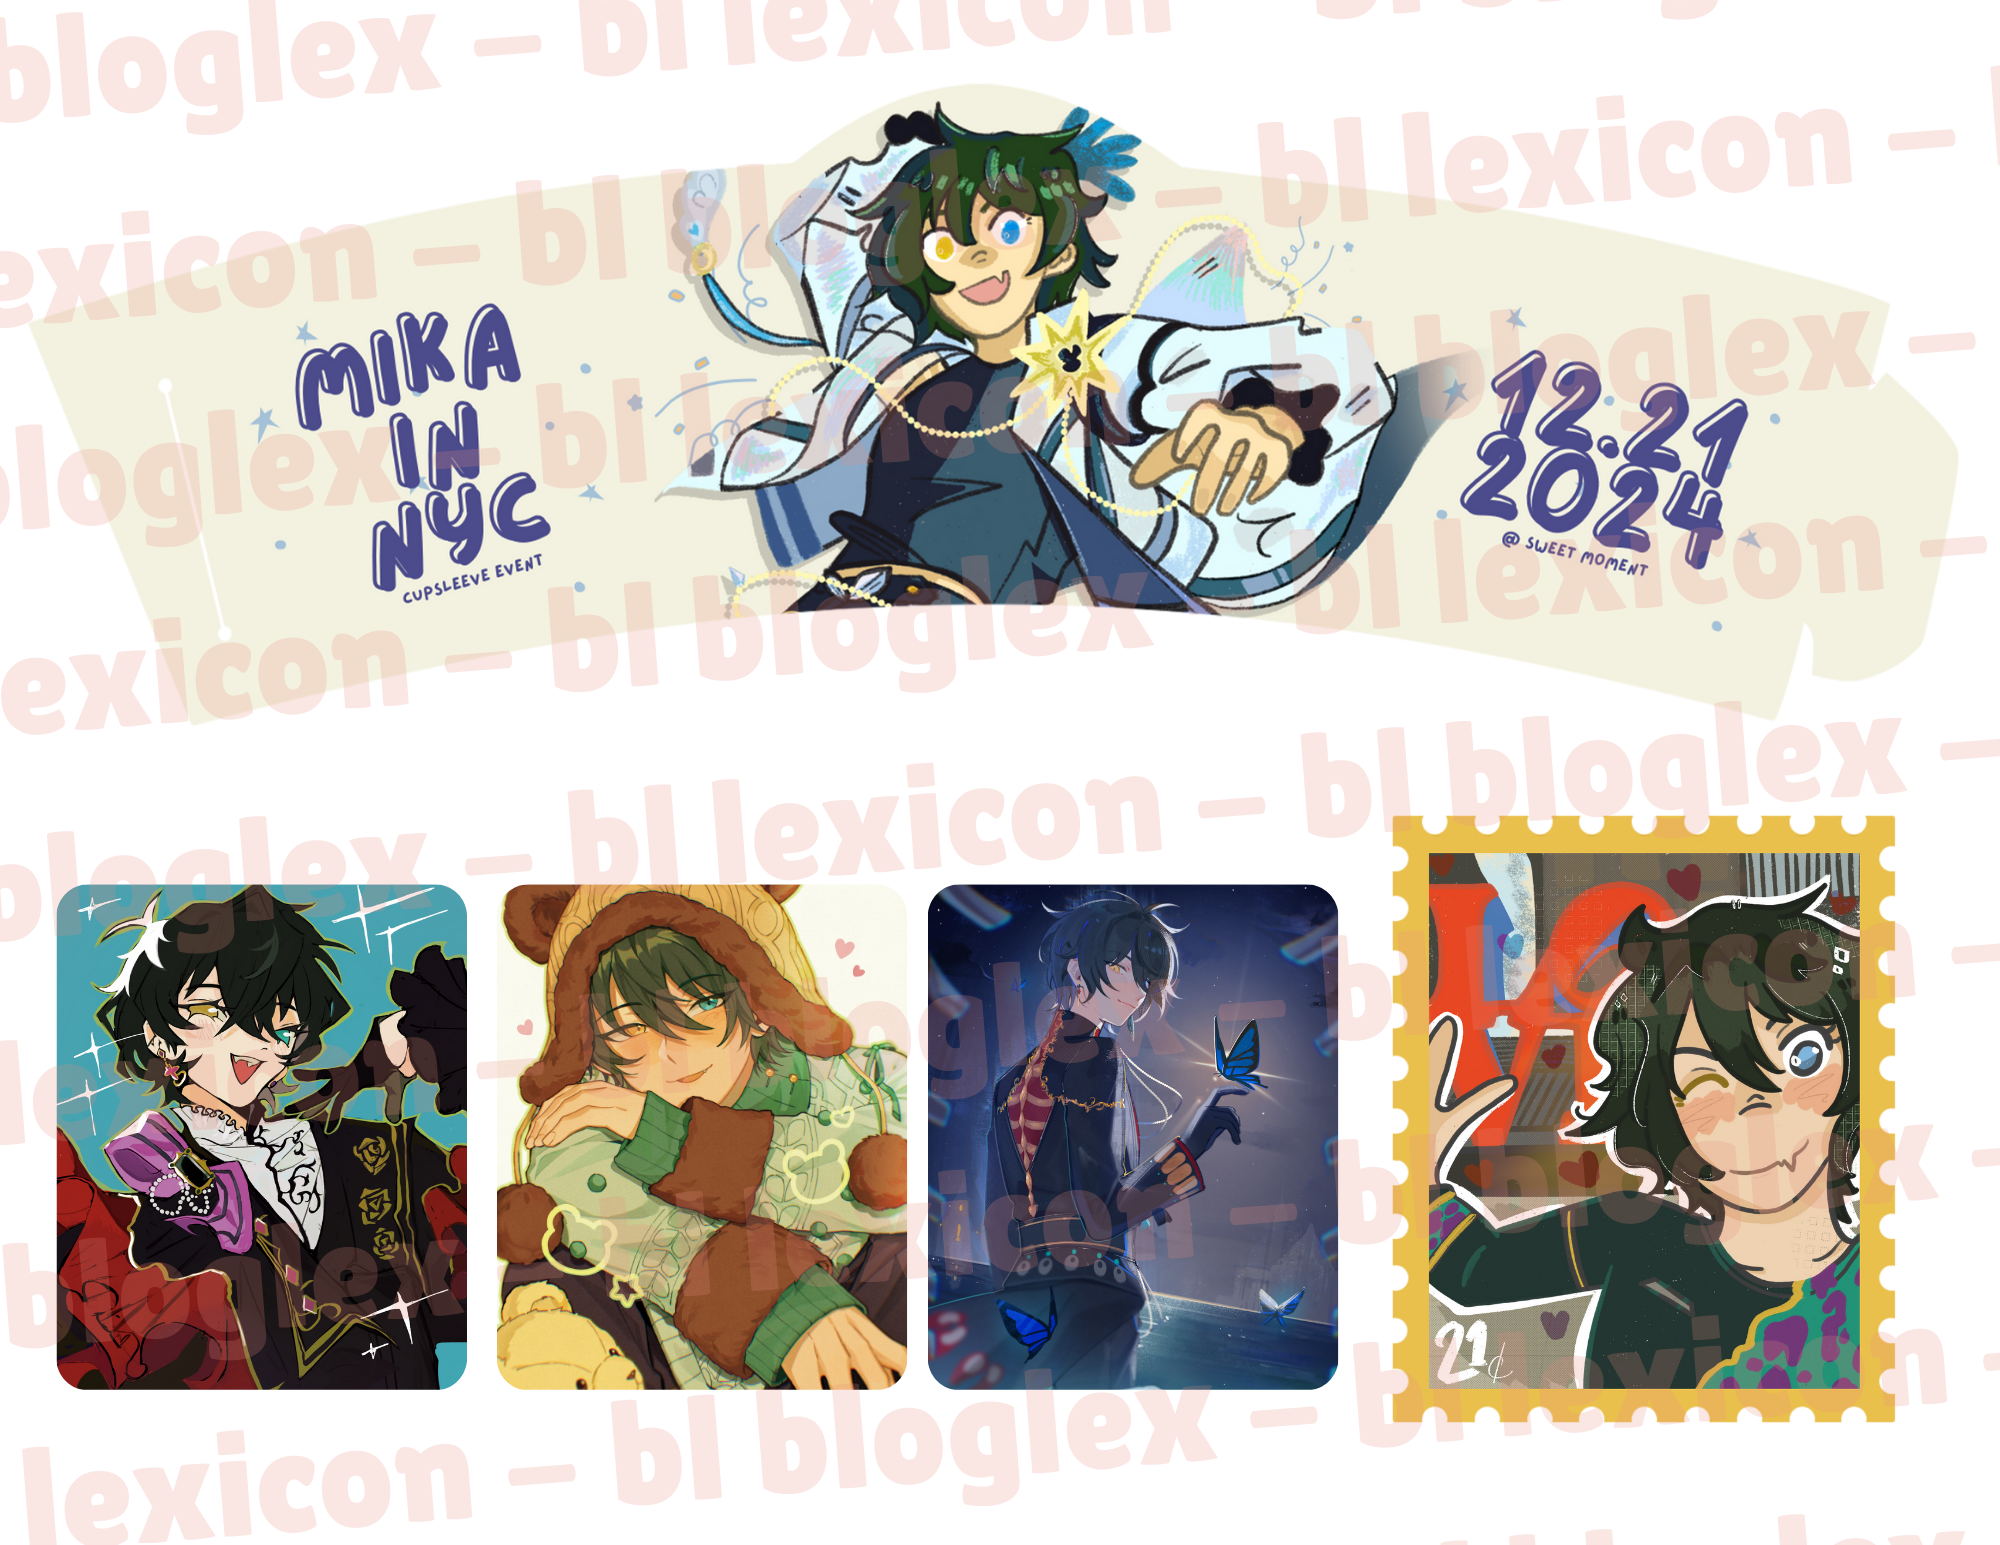
Now you have a venue, it’s time to reach out to artists. For my event, I ended up cold emailing a ton of artists introducing my event and expressing how I'd love for them to be a part of it. PLEASE anticipate paying the artist’s commission prices. If you will be making merch BESIDES the free photocard or cupsleeve, you will need to be transparent. I have written an email example below:
Hello,
My name is Lex and I’m hosting a cupsleeve for Ensemble Stars in NYC for Mika’s birthday! (@ instagram handle)
I’m reaching out because I was wondering if you’d be interested in being commissioned for the event! I’d love for you to draw the free [Cupsleeve or Photocard] that would be handed at the event!
If you’re interested, I can provide specific event details and we can proceed further!
Thank you so, so much! I hope to hear from you soon.
Another option is doing a public call for artists! This allows the community artists to throw their hat in the ring to create art for the cupsleeve, photocards, or whatever freebies you wish to distribute during the event!
I usually ask in these forms a link to their art portfolio or Instagram as well as their commission rates so I know who will be in my art budget! You can also see everyone’s styles and find who would fit best where! You can then reach out to them and BAM you have your artists.
The simple reality is, you really only need to commission ONE artist. For your cupsleeve freebie (with drink purchase). I personally like to at least give one free photocard as well, so for me, my events usually have at least TWO commissioned artists.
VENDORS
Another option available to you is VENDORS!!! Some cupsleeves will have one or two artists who will bring themed goods to sell! This is a WONDERFUL option as you can leave merch creation (beyond the cupsleeve, that’s still your job to provide) to the professionals!
They will bring a small, various amount of merch that are centered around the fandom or character of the cupsleeve and it's great for both you the host, and the artist themselves! They would come during your set up time for the event, and set up their space alongside you.
The way you can find vendors is by doing an open call for local artists and seeing who would be interested in vending!
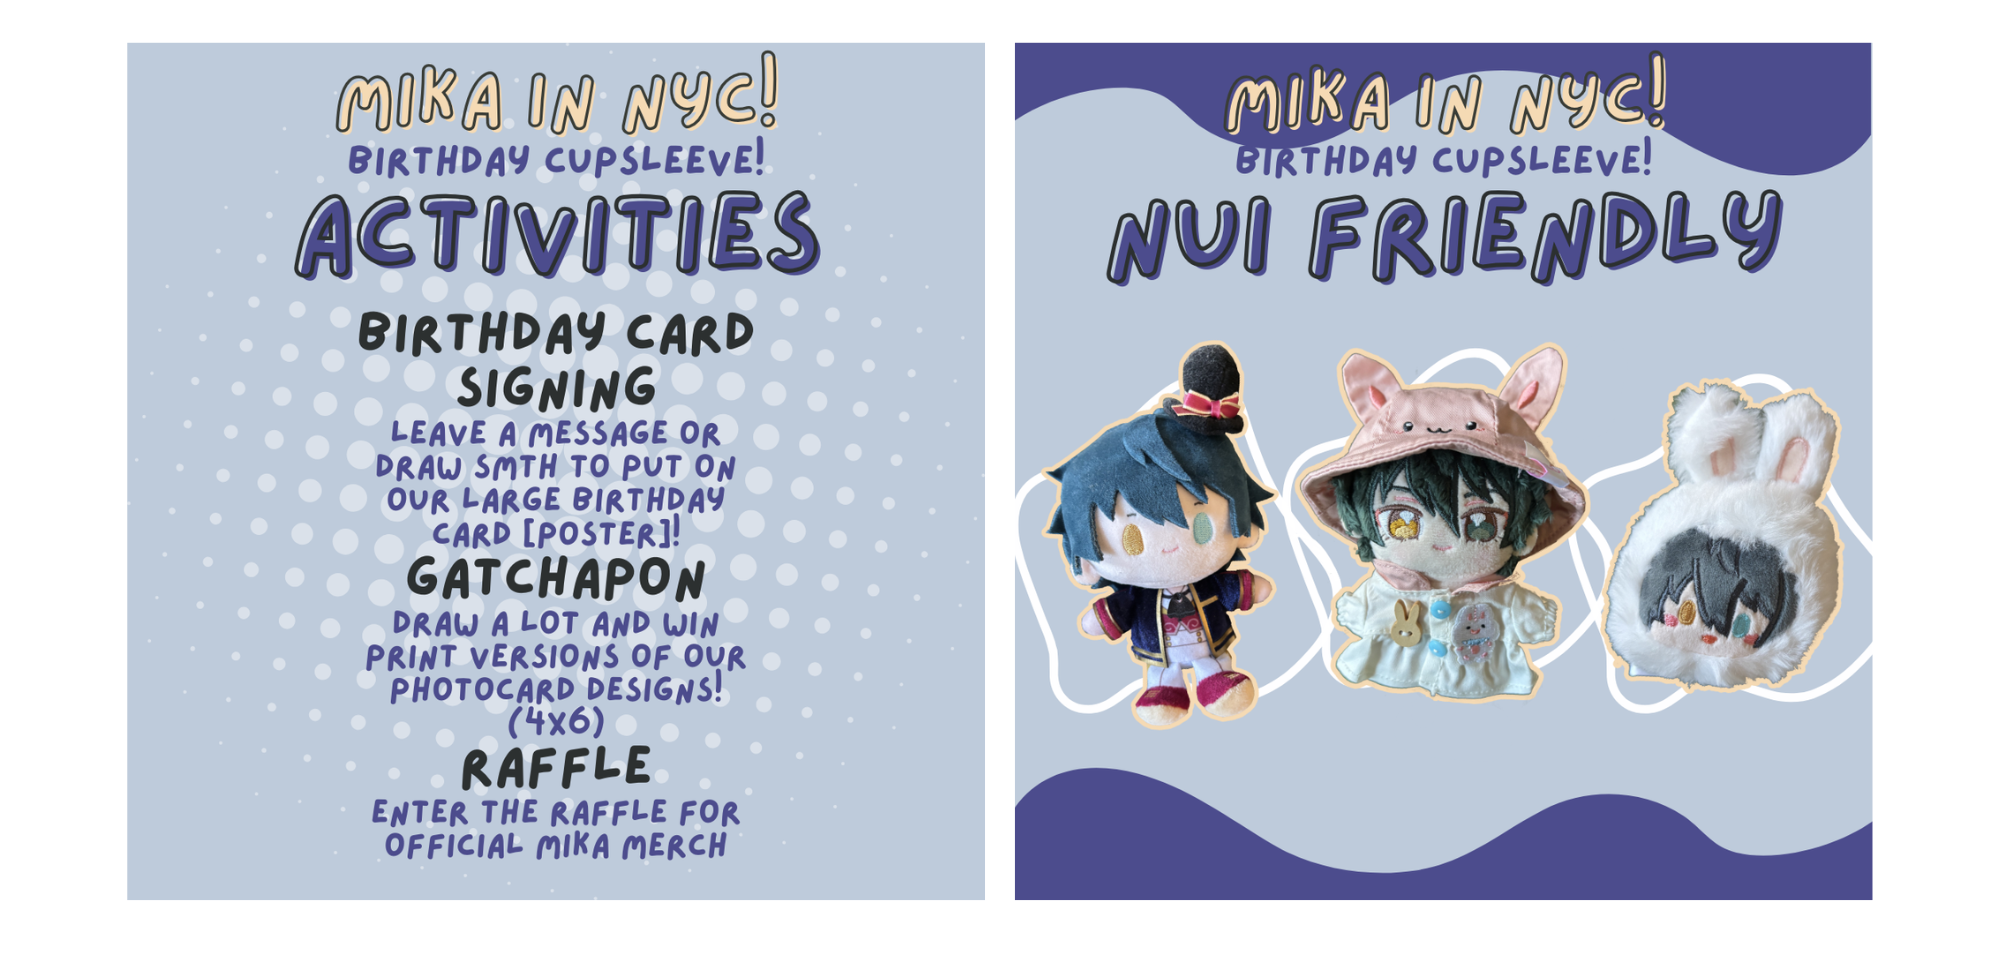
If you’re planning on having small stamp rally events, activities, or raffles, figuring out the fine details is key, as you’ll know by the production phase, what you’ll need to purchase and make for them!
By the end of the pre-production phase, you should have the following things done.
Art has been commissioned and the final piece submitted (give artists a deadline with intervals of follow-ups to check progress status) This deadline should be set at least a month and a half before the event to allot for production times of the paper goods
Venue confirmed and secured
Vendors contacted and confirmed (Optional)
Posts on Social Media to begin drumming interest (multiple posts)
PRODUCTION
Now, it’s time to send that art to get made into a cupsleeve.
You’ll need to find a vendor who can make the cupsleeve, and there are many who can! I personally searched on Etsy and found someone who had high reviews and the cupsleeve shape that I wanted.
You’ll have to design it though OR find someone to design it for you. Most choose to do it themselves.
Personally, I used Canva to make my design. The only template that I used however, was the shape template the printer would be using for the cupsleeve! Everything else was made by my, looking at multiple different cupsleeves and finding the overall vibe and information that would need to be on it.
Once that’s finished, you can pay for your cupsleeve, email them the design (make sure to ask for a proof!), and BAM. Cupsleeve done.
Just make sure you have the right quantity. I ended up printing about 100 cupsleeves, and that ended up being the perfect amount with some left over for my event! It all depends on projected interest size. (I take in follower count, the google form data, ect and add about 20 extra).
Now, if you want to make photocards, I personally like to use Moo. Any business card site will do the job however. Most have a similar size to real photo cards. I liked using Moo because I could have a consistent back of the card with the cupsleeve’s logo/title and the front be multiple different designs, all were the art that I commissioned. I included all 3 designs as freebies, so I had to make sure I ordered enough of each design. You adjust this amount based on what you need. BAM. Photocard(s) are done.
If there are anything else you need to put into production like Stickers, Keychains, Buttons, or more, this is also the time to do them.
For stickers, I’ve used both StickerApp and Vograce. If you’re also creating keychains or buttons, I’d recommend using a service like Vograce since you can have all your items made in one order and save on shipping costs!
If you planned on having any small events or activities back in the pre-production stage, now is the time to also purchase any items or put into production any prizes.
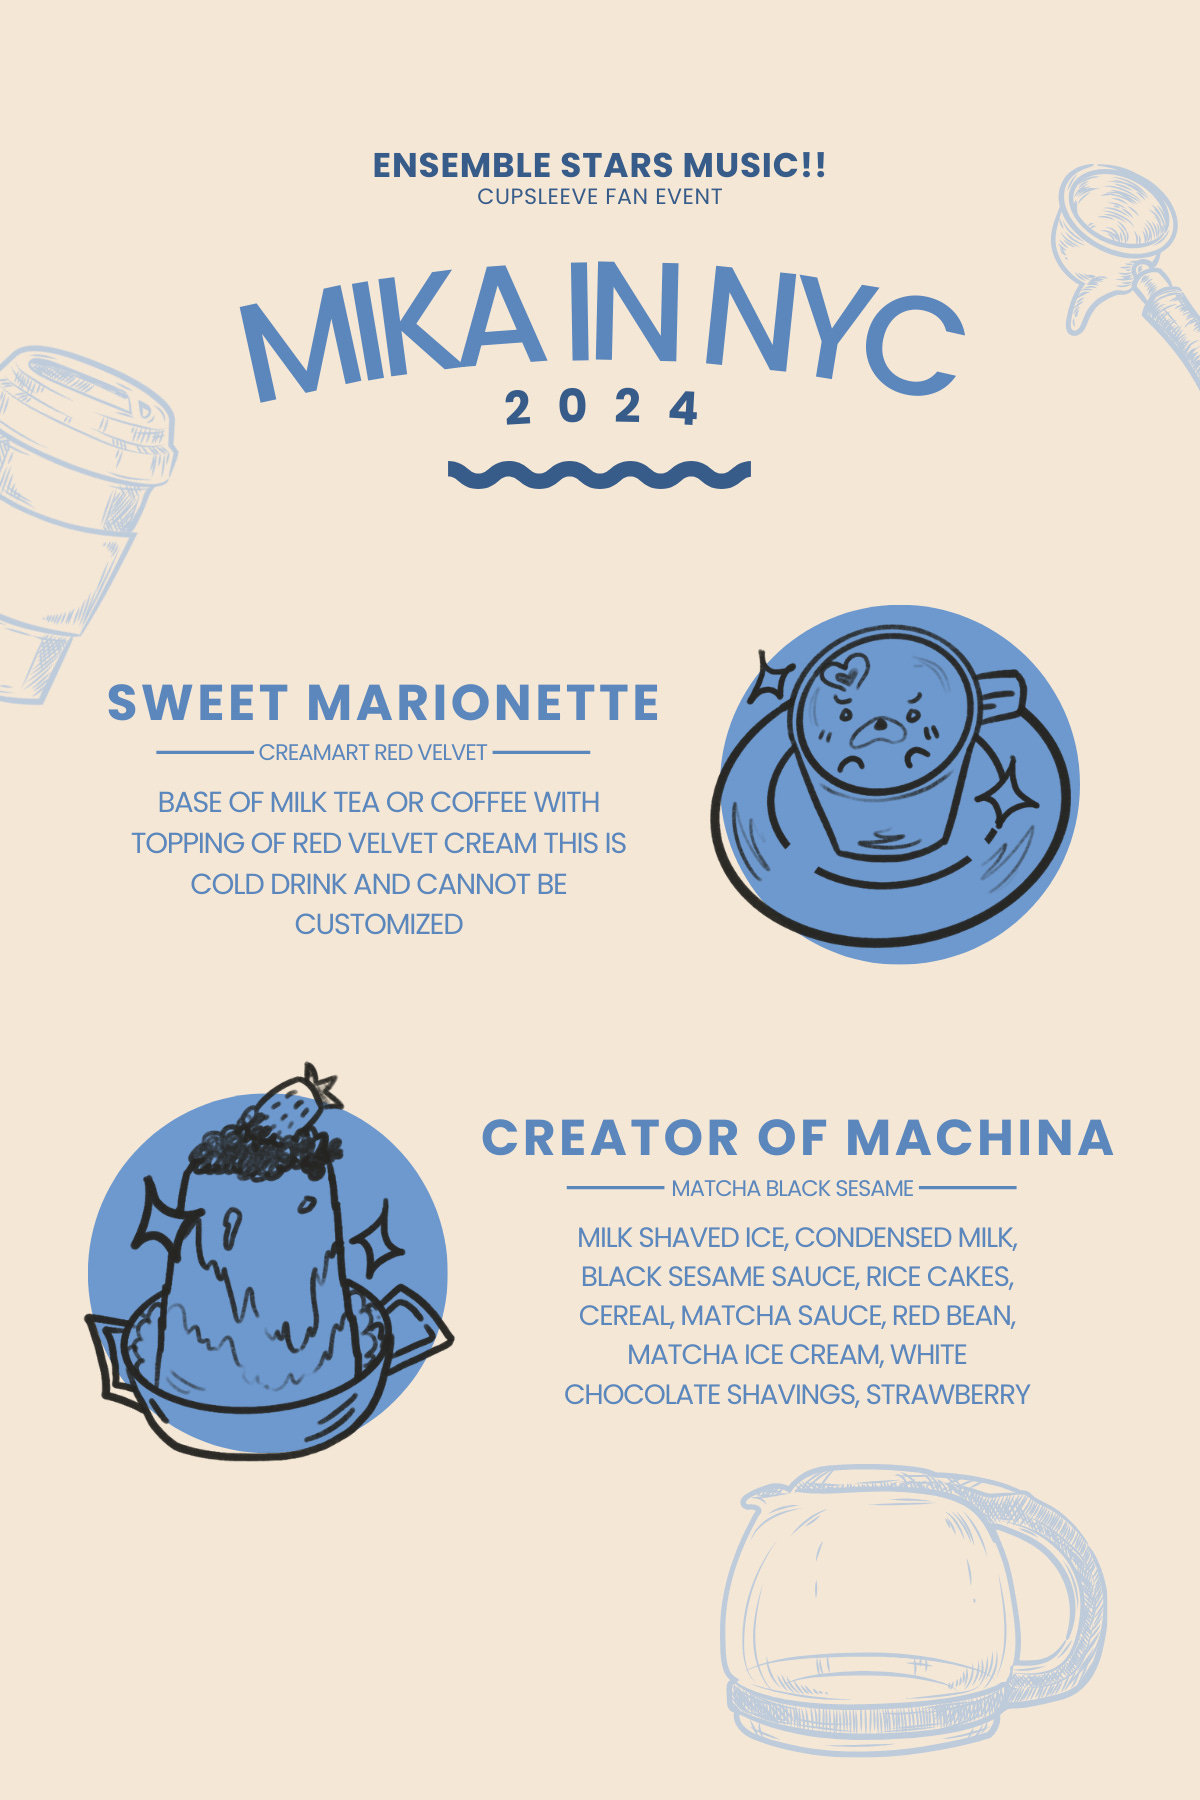
My venue let me create a custom menu, which is literally just renaming drinks they offer to something themed around your cupsleeve for the day. So, I made a cute menu to share at the cash register.
They also let me play chosen music through their speakers, so I had an Enstars playlist that featured ALL Valkyrie songs and about 4 songs from the other units and a large handful of instrumental tracks to add some calm variety.

If you’re buying things to raffle off, it’s also the best time to do so due to shipping times!
If you held preorders for merch, you would also be adding those quantities in and putting them into production as well
Begin looking for helpers if you believe you need it. I will always advocate for at least ONE helper to help you during the entire event. I can be a close friend, a mutual, whomever.
If you want vendors and/or cosplayers to attend the event as well, contact them.
I recommend getting your production order at least a month and a half in advance not matter what you’re putting into production.
By the end of the production process the following should have been done:
Place order for Cupsleeve production
Place order for Photocard production
Keychain, Stickers, Buttons, Etc. production (OPTIONAL)
ANYTHING that you think needs to be paid for and/or created should be submitted by the end of this stage.
Purchase any decorations
Purchase any raffle items or prizes for activities or stamp rallies
If you opened preorders for merch, send those into production as well
Find a helper
Contact vendors and cosplayers with the fine details and possibly create a group chat for all of you to easily communicate in the days remaining until the event.
Once everything comes in, you can begin assembling the freebies, sorting, and creating a system that works for you. I personally like to do this the day before the event, and anticipate different layout options as some venues have smaller setup spaces than others.
ACTUAL EVENT
So, the actual event is here. A lot of the setup will be on the fly. You will now decorate the space as well.
I recommend getting to the venue at least an hour and a half early. Also tell any cosplayers, vendors, or helpers the same thing!
I personally like to use posters and dollar story party decorations, as you can get a lot for a budget price! Printing big posters help fill up wall space, getting a ton of party decorations like streamers, balloons, and things of that nature can be littered throughout the space.
You can also set up any activities. For my Mika Cupsleeve, I had a cute birthday message station for people to draw and write messages, which I then taped to a birthday board for everyone to see.
Other cupsleeves have had stamp rallies where different activities like; writing messages, getting cosplay signatures, buying a drink, doing mini games, and more to get a prize set at the end. (These are MUCH more higher production cupsleeve with multiple hosts and planners at the helm).
At the end of the day, remember that this event is for people to come together and celebrate the character or series. After they’re done with the games, they want to sit, relax, and chat with other fans.
Most events run for about 5-6 hours at around a 11:00AM-12:00PM starting time. This gives people the chance to come to the cupsleeve all afternoon. As always, keep in mind that this is still a shared café space with the regular café customers.
And of course, do not forget to have fun. Even if you’re hosting, you’re still allowed! Even if you’re going to be trapped behind a table, you can still interact with fans, chat, and be involved. Never forget that. It’s a fun event that’s celebrating your love for the topic of your cupsleeve.
POST EVENT
Now, you’re free. Kind of. If you held preorders for any merch, you’ll now be sending them out. If not, you can finally breathe. On your socials you can make a cute recap post thanking everyone for coming and now you can take a well deserved rest.
If there are any post-event responsibilities that you have for yourself, tackle them as soon as you’re able and tie a nice ribbon on this finished event!
Congrats on hosting your first cupsleeve!
TIMELINE BREAKDOWN:
Cupsleeve Idea
Create social media and email
Put out an interest check with a loose date and area location (not venue)
Begin emailing venues
Interest check result
Confirm venue and finalize time details with them
Post venue, date, time official post to use leading up to the event
Begin emailing artists, vendors, cosplayers (anyone who will be attending as staff or creating for the event) or use social media to announce an artist/vendor/cosplayer call for people to submit themselves
Pay artists and give them a deadline
Receive art
Start teasing vendor, cosplayer, and artists participation on socials
Begin creating the cupsleeve
Create any custom posters or information displays (custom menu, hashtag signs, etc.)
Send final designs and items into production (Cupsleeve, Photocards, Posters, Other misc. items) If something needs to be created or printed, it needs to be sent.
Give another general update to your helpers and ‘staff’
Merch reveal post on socials
Buy decorations
Buy anything for activities
Receiving the items from production
Begin sorting, and creating an overall distribution plan for the event.
Remember to check in with your helpers and ‘staff’
Get to the venue at agreed set up time with all helpers and ‘staff’ to begin preparing the space.
Have the event! Make sure to take video and pictures of the space before, during, and after!
Create a social media post with a recap!
IF PREORDERS were done for merch, you will begin shipping.
Make sure everything has been shipped out, finished, and all responsibilities as a host have been met.
If you plan on hosting the same cupsleeve the next year, you can use the same social media profile! (Example: If I wanted to host another Mika themed cupsleeve, I can use the same page to promote it again!)